VertexFlow Tubes stainless steel tube manufacturer logo VertexFlow TubesPrecision SS Tubing

How to Swage an Exhaust Pipe for a Perfect Fit?

Time:2026-11-02 Author:Aria
0%

A secure exhaust connection starts with a pipe end that fits cleanly, without excessive gaps or force. An Exhaust Pipe Swage expands one end of a tube so it can slip over a matching section. The aim is a consistent fit, not simply a wider opening. Small details matter.

Before choosing a swage tool, check the pipe’s outside diameter, wall thickness, material, and intended insertion depth. Measure twice. A caliper and a marker can help you set a clear expansion limit and avoid stretching more metal than the joint needs. Support the pipe firmly, and wear eye protection while working with metal and hand or powered tools.

This guide explains how to prepare the pipe, select a suitable expander, and widen the end in controlled steps. It also covers checking the joint, correcting minor fit issues, and recognizing when a pipe is too thin, damaged, or uneven to swage reliably. Do not force a tool that binds, or keep expanding a pipe after cracks or deep creases appear. A slightly imperfect fit can still be a warning sign. The right next step may be a different connector or professional inspection, rather than more pressure. Exact results depend on the pipe material, tool design, and measurements, so check the tool maker’s instructions and inspect the finished joint before installation.
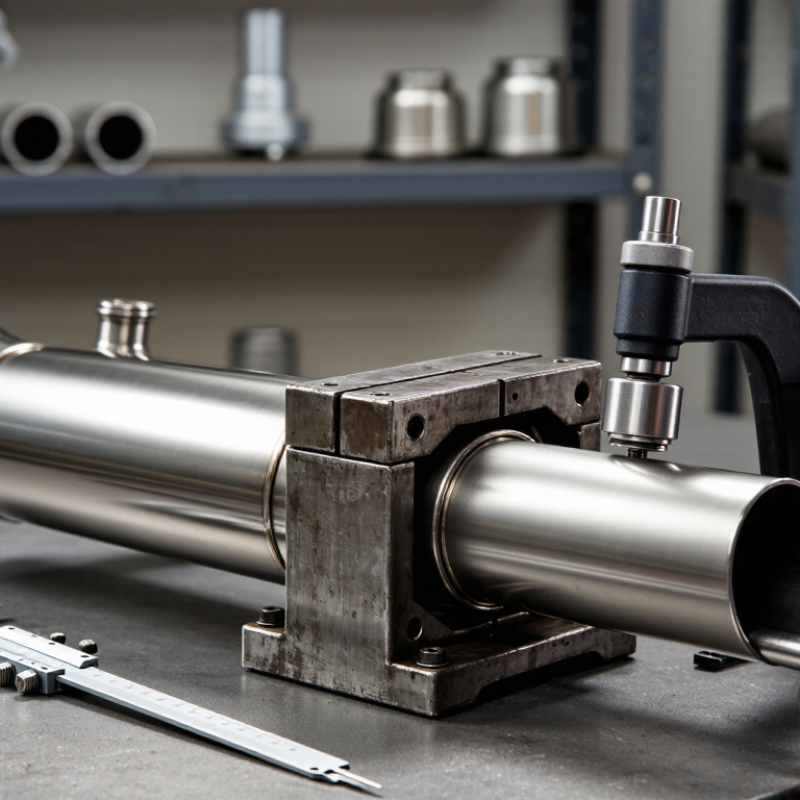
How to Swage an Exhaust Pipe for a Perfect Fit?

Understanding Exhaust Pipe Swaging and Its Purpose

Exhaust pipe swaging reshapes one pipe end so it can fit over another pipe of the same nominal diameter. Instead of meeting edge to edge, the expanded end creates an overlapping slip joint. That overlap helps hold the pipes in alignment and gives a clamp or weld area to work with. Swaging is not a seal by itself. Fit matters.

In practice, the required expansion depends on pipe diameter, wall thickness, and the condition of the metal. Measure both pipes before forming; even a small mismatch can make assembly frustrating. Too little expansion may leave the pipes difficult to join, while too much can loosen the fit or thin and distort the pipe end. Not ideal. A sound joint should slide together without force, with enough overlap for the chosen fastening method. Check for cracks, heavy rust, or a distorted edge before swaging, since damaged metal may not hold its shape. It is easy to focus on the flare and overlook the joint’s actual fit. That deserves a second look.

How to Swage an Exhaust Pipe for a Perfect Fit?

Swaging expands one pipe end so it can slip over another. This chart shows illustrative swaged-end outside diameters for a receiving pipe with a 51.6 mm inside diameter. Each value is calculated by subtracting the selected diametral clearance; these clearances are examples, not universal specifications.

Measure the actual parts before swaging. The required fit depends on the pipe dimensions, material, and joining method.

Selecting the Pipe, Swaging Tool, and Correct Die

A close exhaust-pipe fit starts with accurate measurements, not guesswork. Measure the pipe’s outside diameter and wall thickness, then check the receiving pipe’s inside diameter. Leave enough clearance for insertion without creating a loose joint. Small details matter. Inspect the pipe for rust, dents, and an out-of-round end; a swage will not reliably correct damaged tubing. Choose material and tubing thickness suited to the exhaust system, since thin metal can deform during expansion.

Match the swaging tool to the pipe diameter and the amount of expansion required. A tool that is undersized may need excessive force, while an oversized one can stretch or split the pipe. Select a die designed for the tool and suitable for the pipe’s starting size. Die shapes vary, so confirm the intended finished diameter rather than relying on a label alone. Do not guess. I would rather remeasure than discover a cracked edge after the pipe is installed.

Secure the pipe so it cannot twist, and align the die squarely with its end. Expand in controlled increments, checking the fit often against the mating pipe. Stop when the joint slides together snugly; forcing one more turn can thin the metal. Wear eye protection and follow the tool maker’s operating instructions. The first fit may be slightly imperfect, which is a useful reminder to measure again before making another adjustment.

Preparing the Pipe and Setting Up the Swaging Tool

Before swaging, let the exhaust pipe cool completely and secure it on a stable workbench. Wear safety glasses; freshly cut metal edges can be sharp. Make a square cut, then remove burrs from both the inside and outside edges. A small ridge can snag the mandrel or leave the finished joint uneven. Wipe away dust and oil, and check the pipe for cracks or deep corrosion. Measure the pipe’s inside diameter and the overlap needed for the mating section. A quick test fit can reveal a mismatch before you expand anything.

Choose a swaging tool and die suited to the pipe’s material, wall thickness, and diameter. Check the tool for wear, then align its mandrel with the pipe’s centerline. Keep the pipe supported close to the work area so it cannot flex or slip. Follow the tool’s instructions on lubrication and operating pressure; not every setup uses the same method. Expand in small, controlled steps, checking fit as you go. I once treated a slightly crooked setup as “close enough.” It wasn’t. The resulting lip sat unevenly, and correcting it took longer than careful alignment would have.

Expanding the Pipe Gradually to Form a Socket

A clean socket starts with a cool, stable pipe. Remove burrs from the cut edge, then wipe away dirt that could score the metal. Mark the intended insertion depth on the pipe with a marker. That line gives you a clear stopping point. Secure the pipe so it cannot roll, and keep the section being expanded accessible.

Fit a correctly sized exhaust-pipe expander into the end. Turn its drive gradually, following the tool maker’s instructions, so the segments press outward in small increments. Go slowly. After each short turn, release pressure and check the opening against the mating pipe. The fit should slide together without force, with enough overlap for the planned joint. A little lubricant approved for the tool can help, but too much may hide slipping or damage.

The first pass may look uneven. Stop and inspect for cracks, folds, or a sharply flared edge before continuing; thin tubing can distort quickly. If the pipe remains tight, expand it a little more rather than forcing the pieces together. Check again. I have found that repeated trial fitting takes longer, but it reduces the chance of making an oversized socket that rattles or leaks. Wear eye protection and gloves, and never work on a hot exhaust.

How to Swage an Exhaust Pipe for a Perfect Fit? — Expanding the Pipe Gradually to Form a Socket
Stage Action Example Measurement Fit Check Practical Tip
1. Measure and prepare Measure the receiving tube’s outside diameter and wall thickness. Cut the pipe square, deburr both edges, and clean the area to be expanded. Example: 50.8 mm (2 in) outside diameter tubing with a 1.5 mm wall. The end should be round, clean, and free of burrs or cracks. Use the actual measured tube size rather than relying only on its nominal size.
2. Lubricate and align Apply a suitable swaging lubricant to the pipe end and tool. Secure the pipe and align the expander with its centerline. Mark an insertion depth of about 40 mm for this example. The tool should enter straight without contacting the pipe at an angle. Follow the tool manufacturer’s instructions and use eye protection.
3. Make the first expansion Expand the end using the smallest appropriate expander step or die. Remove the tool and inspect the pipe. Illustrative socket inside diameter: approximately 50.9 mm. Check for even expansion around the circumference. Small, controlled increments help reduce splitting and out-of-round distortion.
4. Expand progressively Advance to the next tool step and repeat, measuring after each pass. Illustrative intermediate inside diameter: approximately 51.0 mm. Compare measurements at several points around the socket. Stop and correct alignment if the socket begins to expand unevenly.
5. Reach the target size Make the final controlled pass, allowing for material springback. Test the joint with the mating pipe. Example target: approximately 51.1 mm inside diameter for a 50.8 mm mating tube. A short section of the mating tube should slide into the socket with a snug, consistent fit. Actual clearance depends on material, tooling, wall thickness, and measurement; verify by test-fitting.
6. Inspect and finish Remove the pipe, deburr the socket edge, and check the joint before clamping or welding. Example insertion depth: about 40 mm, subject to the joint design. Confirm there are no splits, sharp edges, or visible gaps that could compromise the joint. Do not use a damaged or badly distorted pipe; follow applicable vehicle and exhaust-system requirements.

Note: Measurements are illustrative workshop values, not universal specifications. Confirm dimensions on the actual pipes and allow for material springback.

Checking the Fit and Correcting Swaging Problems

After each swaging pass, let the pipe cool if it has become warm, then check the fit by hand. The expanded end should slide over the mating pipe without hammering, yet have little side-to-side movement. Mark the intended insertion depth with a pen so you can see whether the joint seats fully. A bright flashlight helps reveal a rolled lip, a small split, or uneven expansion. Check the pipe from several angles; a joint can look round from above and still be slightly oval. Small details matter.

If the fit is too tight, confirm that burrs or a raised edge are not catching. Remove sharp edges, then make one small, even sizing pass and test again. Avoid forcing the tool deeper to fix a local tight spot; that can distort the pipe. If the joint feels loose, more swaging will not correct it. Trim back to sound, round tubing if enough length remains, or choose a properly sized connector. I have seen clamps hide a poor fit temporarily, but they cannot restore a distorted sealing surface. Recheck alignment before tightening, and inspect the joint for leaks only after the exhaust is fully assembled and cool.

FAQS

What measurements should I take before swaging an exhaust pipe?

Measure the pipe’s outside diameter and wall thickness. Check the receiving pipe’s inside diameter and the required overlap. Small differences matter.

How do I choose the right swaging tool and die?

Match them to the pipe’s diameter, material, wall thickness, and needed expansion. Check the intended finished diameter instead of trusting a label alone.

How should I prepare the pipe before expanding it?

Let it cool completely. Make a square cut, remove inside and outside burrs, then wipe away dust and oil. Check for cracks or deep corrosion.

How can I keep the pipe steady during swaging?

Secure it on a stable workbench and support it near the work area. Align the mandrel with the pipe’s centerline. No twisting.

How do I form the socket without overexpanding it?

Turn the tool in small increments, following its instructions. Release pressure and test the fit after each short turn. Stop when the pieces slide together snugly.

What should I use as a stopping point?

Mark the planned insertion depth with a marker. Check that the joint has enough overlap, but do not force the mating pipe into place.

What signs mean I should stop and inspect the pipe?

Look for cracks, folds, a sharply flared edge, or an uneven lip. Thin tubing can distort quickly. Stop and reassess.

What safety steps matter during this work?

Wear safety glasses and gloves, and never work on a hot exhaust. Follow the tool’s instructions for pressure and lubrication. I once skipped careful alignment; fixing the uneven lip took longer.

Conclusion

Exhaust Pipe Swage techniques help create a smooth, slightly enlarged socket at the end of a pipe, allowing it to join another section with a secure, close fit. The process begins with choosing a pipe material and diameter suited to the application, then selecting a compatible swaging tool and die. Clean the pipe end, remove burrs, and secure the tool on a stable surface before starting.

Expand the pipe gradually rather than trying to form the socket in one pass. Make small adjustments, checking the shape and fit as you work to avoid cracks, folds, or excessive expansion. When the joint slides together evenly without being too loose, the swaging is complete. If the fit is uneven, inspect the pipe and die, correct the alignment, and make careful adjustments until the socket is properly formed.


Aria

Aria

Aria is a dedicated marketing professional with a deep passion for innovative strategies and a keen understanding of our company's product offerings. With a wealth of experience in the industry, Aria excels at crafting engaging content that highlights the unique features and benefits of our......